Introduction to Helm
-
Myron Zaiets
- 10 Apr, 2023
- 02 Mins read

Hi,
In this article, I want to talk about Helm and show you how it helps us when we work with Kubernetes.
So, what is Helm?
Helm is a package manager for Kubernetes. In simple words, it streamlines the process of deploying K8s applications. So what are the benefits of using Helm:
- Fast deployment with just one command, so better productivity.
- You can create your own Helm charts or use some already created ones.
- Using Helm charts across different environments.
- A very easy rollback/upgrade process.
There are just a few benefits, in reality, you will notice more for sure. Another benefit is that you don't need to create a separate YAML file for every manifest. Helm will manage it for you. Let's consider 2 examples.
- We want to use some community-chart as a Helm chart. How to do that:
Le'ts use Artifact Hub to find some. I am using NGINX in my case. So I find NGINX helm chart.
To install you just need 2 commands:
*** helm repo add my-repo https://charts.bitnami.com/bitnami***
helm install my-release my-repo/nginx
That's all, NGINX is already installed on your cluster.
- Another example is more interesting. Let's create our own Helm chart:
- To start, we will type helm create python-app. Python-app is our chart name. Once we have done with this command, we'll have the following files created:
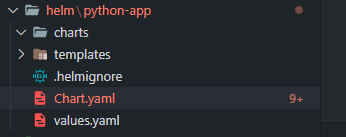
Let's describe those files:
charts - here we specify some dependencies, we want to use in our app
templates - here we store our manifests
***Chart.yaml ***- this file describes our Helm chart (version, name, and so on...)
values.yaml - here we set the default values for our manifests
OK, now we know the purpose of all files, so let's deploy some simple Python hello-world app, which is stored in Docker hub. Firstly, let's delete all files from the templates folder: rm -rf templates/
Add just one deployment.yaml file for our Python app.
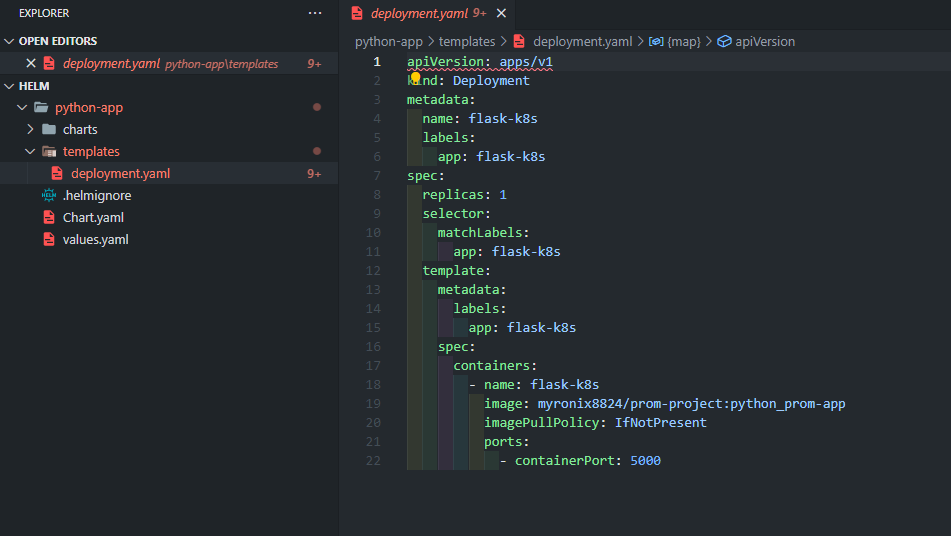
We can deploy it this way, but let's parametrize it and use also values.yaml file. So in the end we will have something like this:

Let's check what we have here:
{{ .Release.Name }}-deployment - the name of our deployment will be the name of our release when we install our Helm chart.
{{ .Values.replicaCount }} - this will go from our values file
{{ .Chart.Name }} - the name of our chart from Chart.yaml file
Let's use the dry run to check what we will be installed, we will name our release as python-app: helm install --dry-run python-app python-app
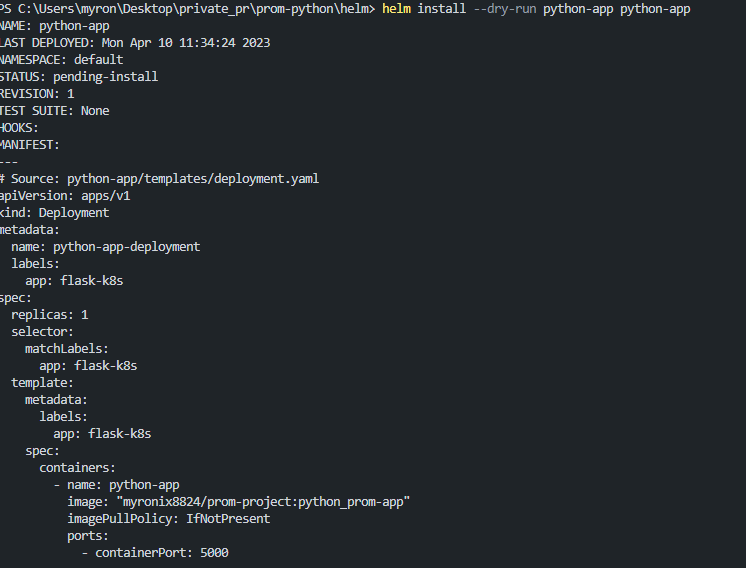
This manifest will be installed, and as you can see the release name will be populated dynamically. OK, let's install our helm chart: helm install python-app python-app

If we check our minikube we see that our app is deployed:

If we have a new release, we just need to update the image tag. After that, a new version will be deployed.
Let's type helm list command to check the list of our releases: helm list

To delete a release, we will write:*** helm uninstall python-app***
We can add additional manifests into templates folder like service, ingress, hpa and others. Then by using just one command: helm upgrade python-app python-app and will we have our app deployed with changes. All parameters we will put into values.yaml file.
This was just a quick intro to Helm.
Thank you for your time.